
HA
1.A. Import PassMan image directly into V.Center
Download the latest version as an image file, available from this page (the file contains about 2GB of data)
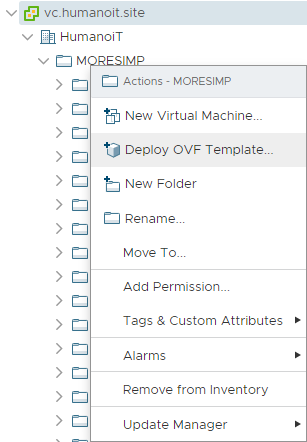
- In V.Center, select the folder where you want to import:
- Right-click: Deploy OVF Template, then upload the file from the machine (Local file option):
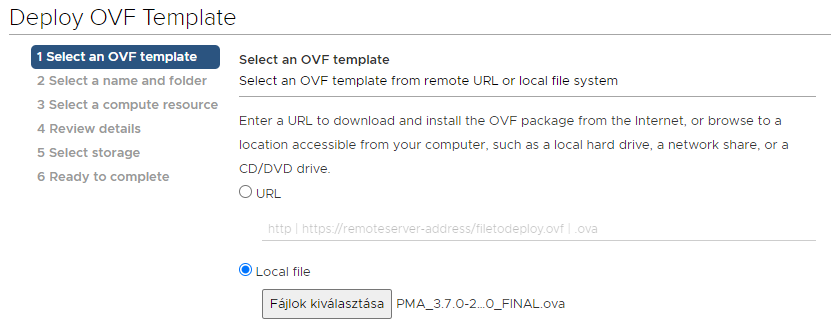
You will then see the NEXT option.
3. Select a destination folder and -if you wish- change the hostname offered:
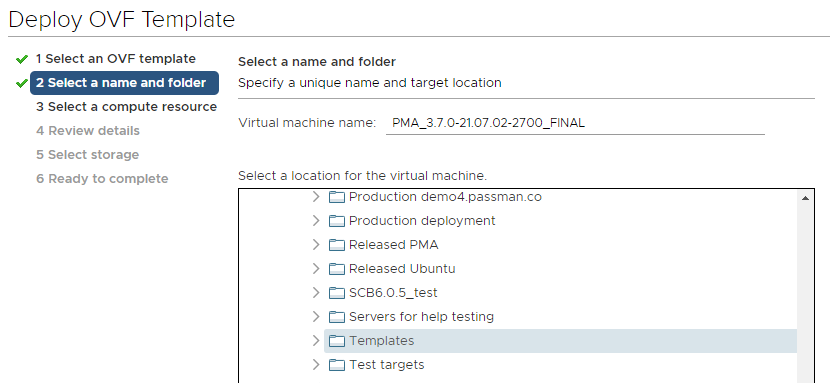
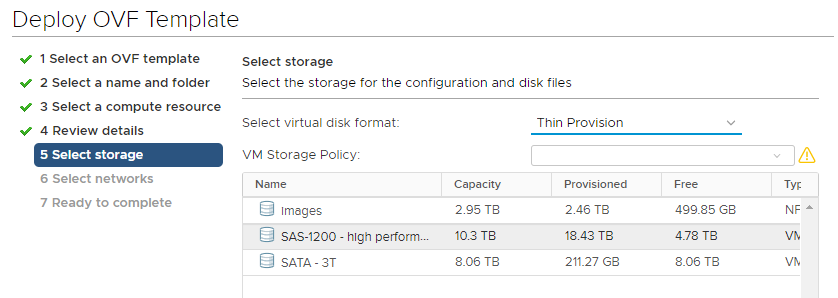
4. Choose from the available stores (storage servers) where the virtual machine will be located:
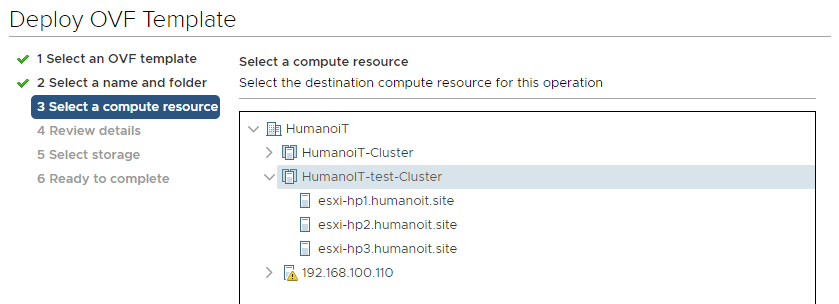
5. There's nothing to do with the review details window: feel free to continue.
6. Then make sure to install the machine in Thin Provision (space-saving mode). There are several types of this, but we prefer the 'traditional one'.
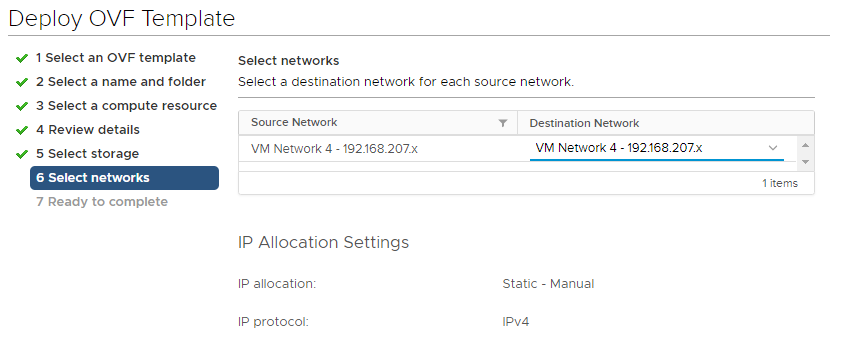
7. For the Network setting, make sure that the machine will be placed on a network, that has 4 free IP addresses.
8. When you are done with the installation (about 10 minutes), continue with step 2 to multiply them.
1.B. Import PassMan image by PowerCLI
The import process can also be done by using Vmware PowerCLI:
If you do not already have PowerCLI installed, you need to download the program HERE and install it.
Once the program is started, run the following command:
- Log in to the VCenter: Connect-VIServer -Server vcenter_szerver -User administrator@vsphere.local -Password "password"
Name Port User
---- ---- ----
vc 443 VSPHERE.LOCAL\Administrator
- $ovfpath = ".\PMA_3.0.0-20.07.10-1281_FINAL.ova"
- $ovfConfig = Get-OvfConfiguration -Ovf $ovfpath
- Import-VApp -Source $ovfpath -OvfConfiguration $ovfConfig -Name "Passman_VM_name" -VMHost "server_name" -Location "cluster_name" -Datastore "datastore_name" -DiskStorageFormat thin -Confirm:$false
Name PowerState Num CPUs MemoryGB
---- ---------- -------- --------
Passman_VM_name PoweredOff 2 4,000
WARNING
The imported VM image must not be started, because there are processes that only run on the first start!
- Log in to the VCenter: Connect-VIServer -Server vcenter_szerver -User administrator@vsphere.local -Password "password"
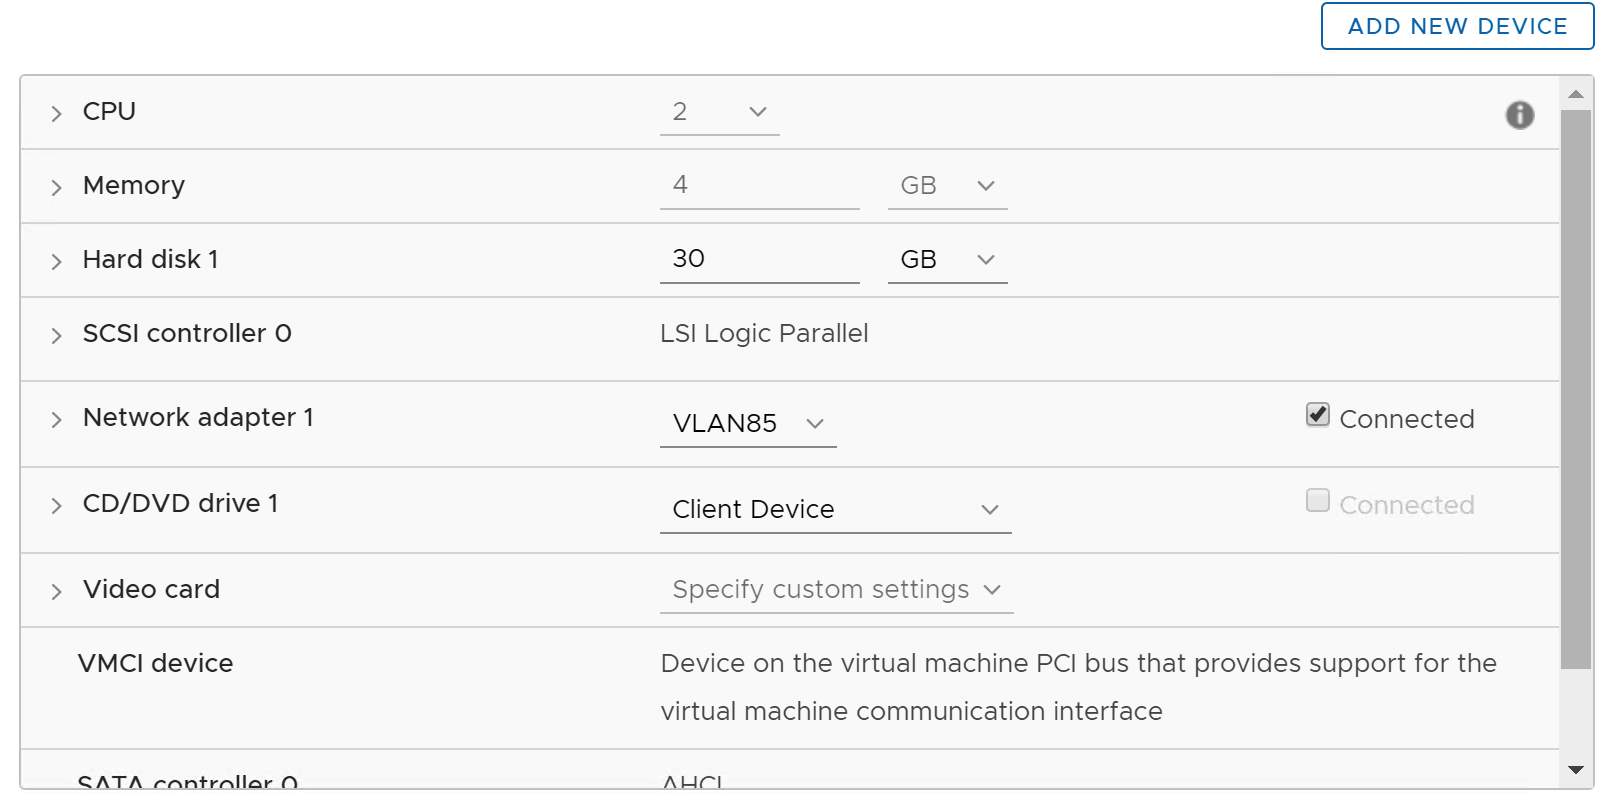
Then select the appropriate network where your live VMs will be placed:
2. Machine cloning in 2 copies
- Leave the imported machine switched off! Let's clone the machine that is not yet turned on.
We will need 2 copies to have a total of 3 equivalent devices.
Right-click / Clone / Clone to Virtual Machine...
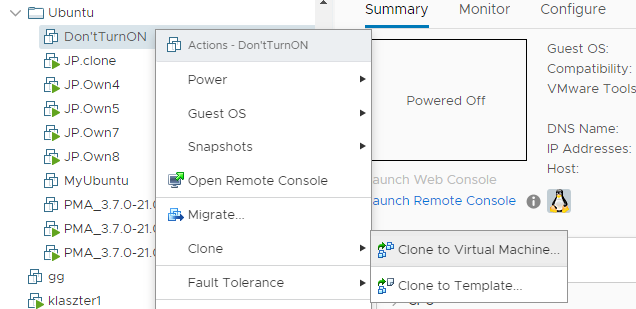
- During cloning, set the parameters: hostname, target server (storage), space-saving mode (thin provisioning).
- Nodes should be on the same network segment (different network is not supported by the vendor).
Machines will use DHCP to request IP at first start up, so it's important to have DHCP service for the selected network segment.
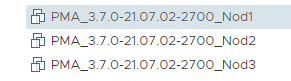
In case there is none, you will have to manually set an IP address according to chapter 3.B.- Let's name the machines consistently (it's worth it to keep the version number, marking the Node# at the end)
3.A. Check IP addresses of cluster nodes (in case of DHCP)
Switch on the machines with the right button: Power / Power On:
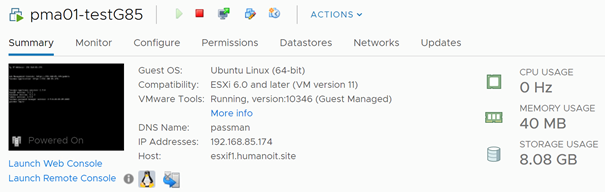
The cloned machines have received IP addresses by DHCP. There are 2 ways to find out these IP-s:
- Using VMware tools, we see this: (IP Address entry next to small screen)
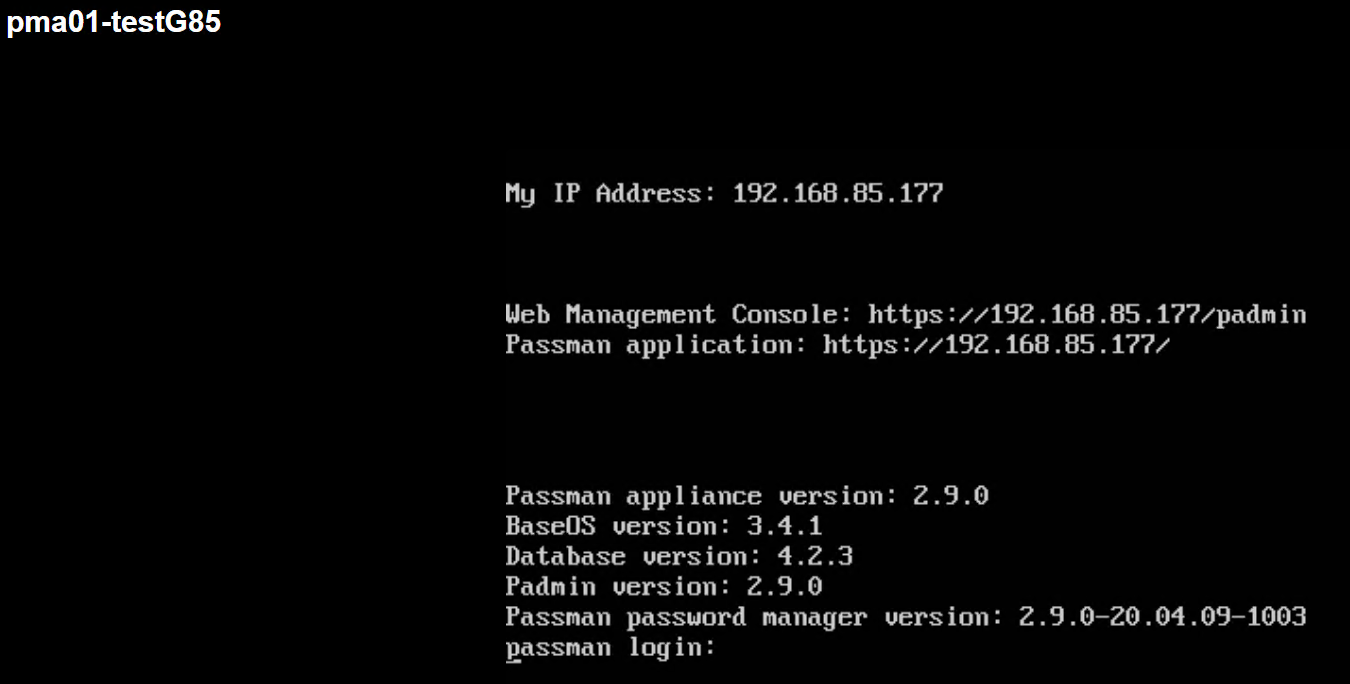
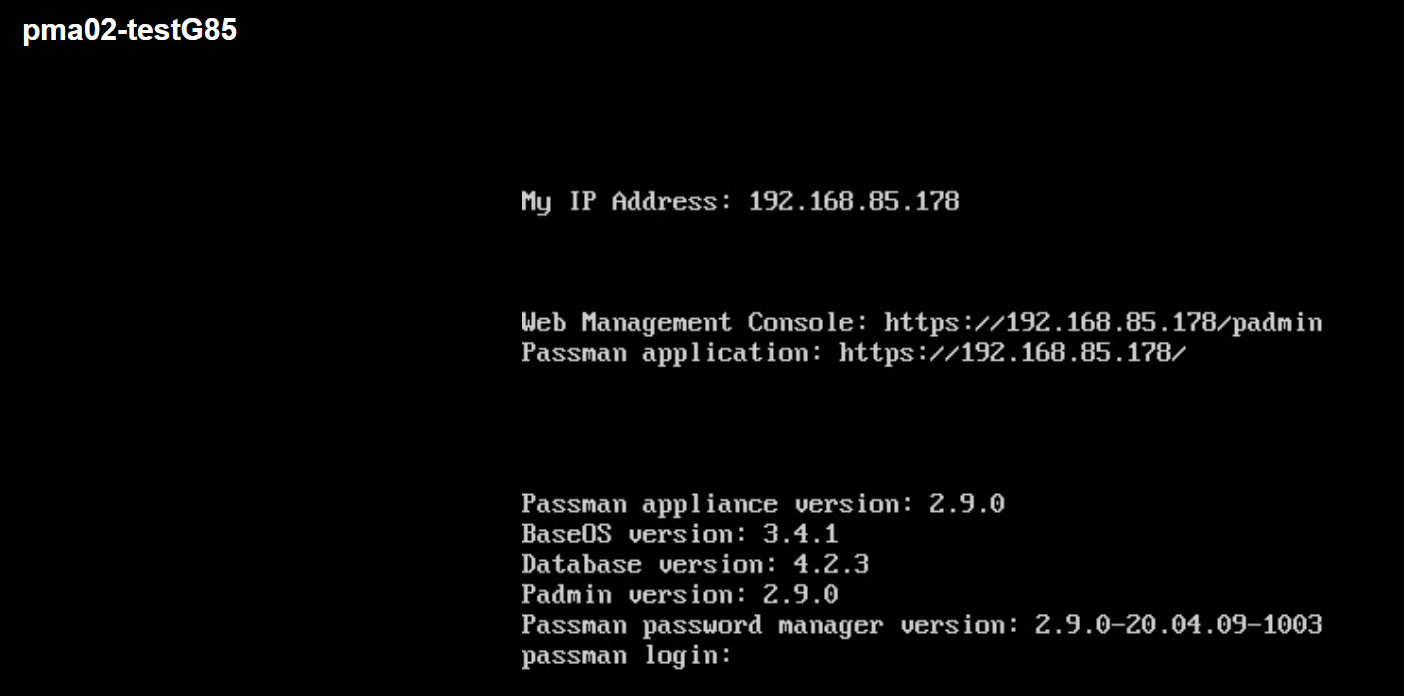
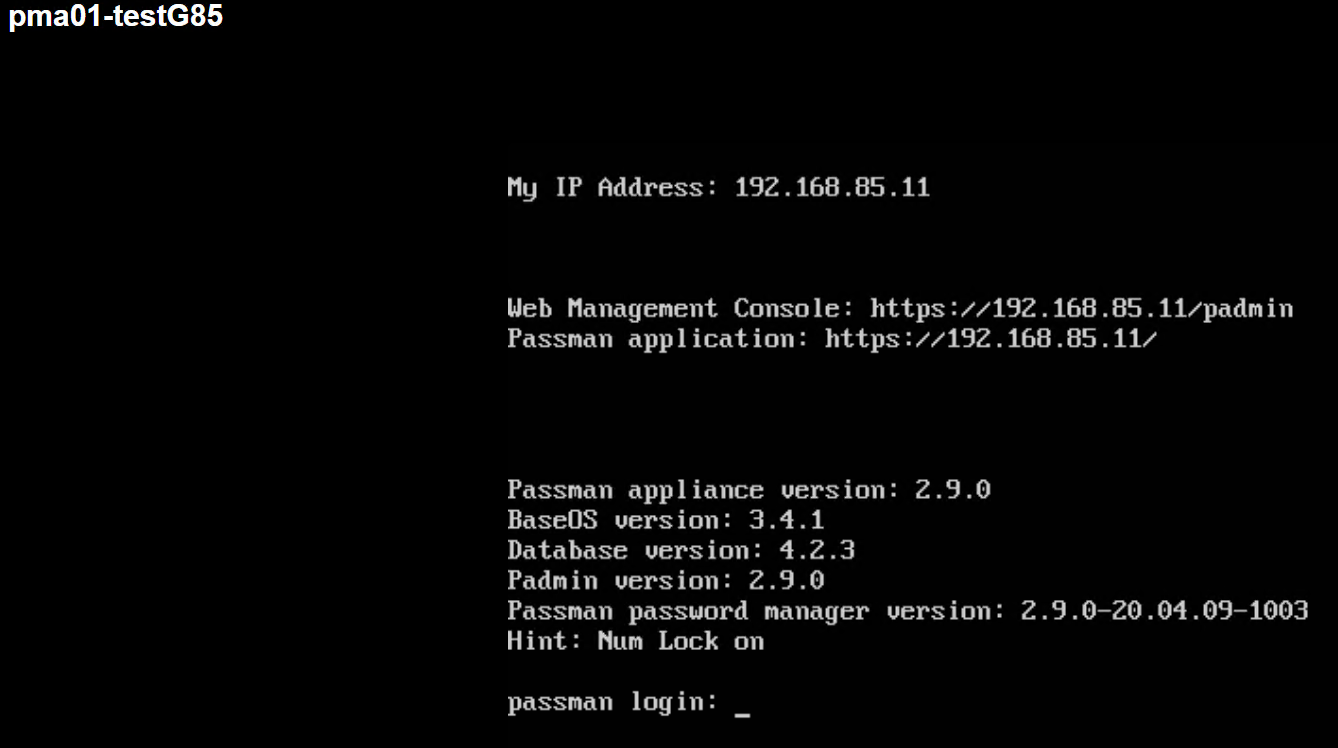
- after opening the Web Console (Launch Web Console), you can see it at the top of the console at My IP Address:
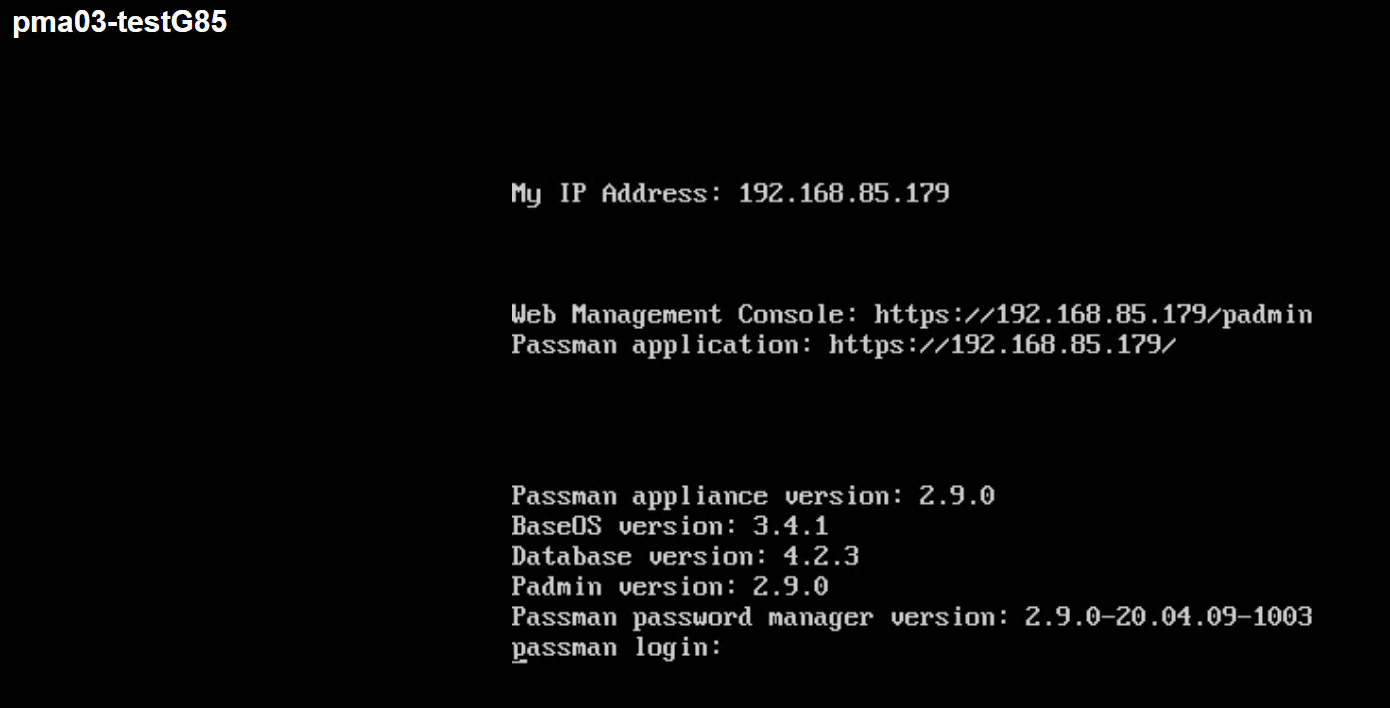
3.B. Check IP address of cluster nodes in the absence of DHCP
Open the VM Web Console of each cluster node and log in with changeip user (password: changeip) :
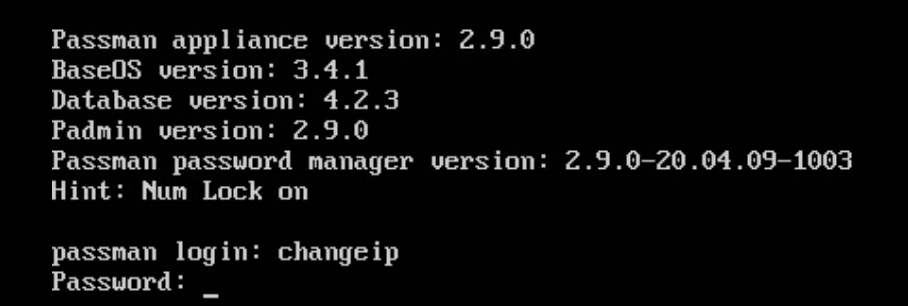
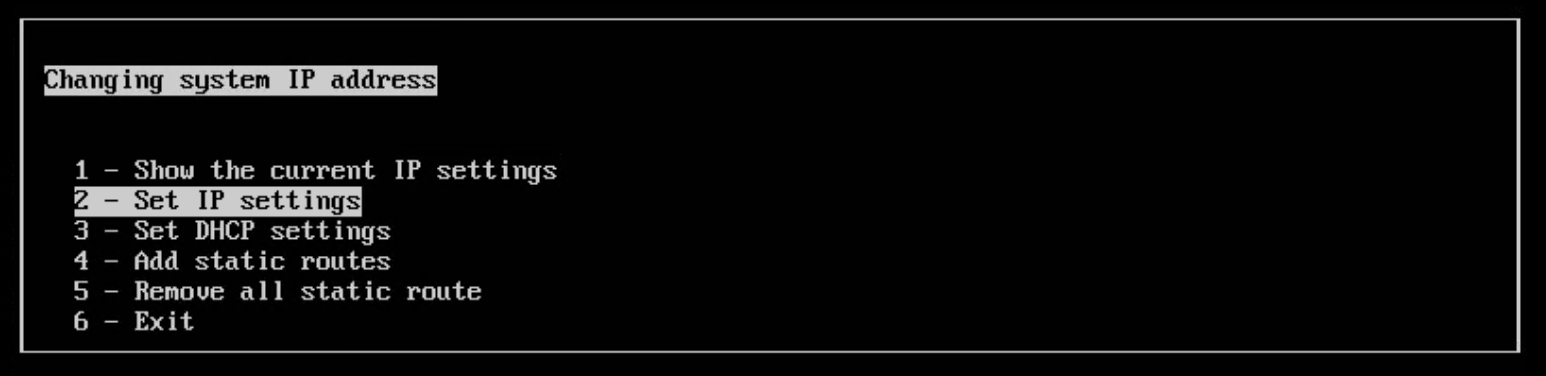
From the menu, select the 'Set IP settings' option:
Set the parameters. (The example shows the setting for node 1)
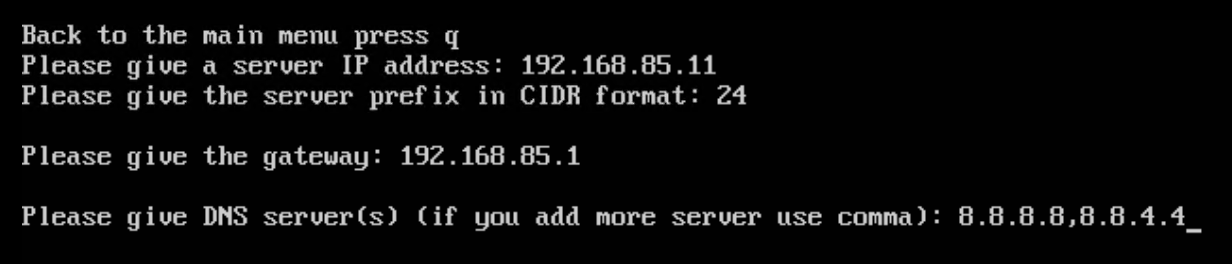
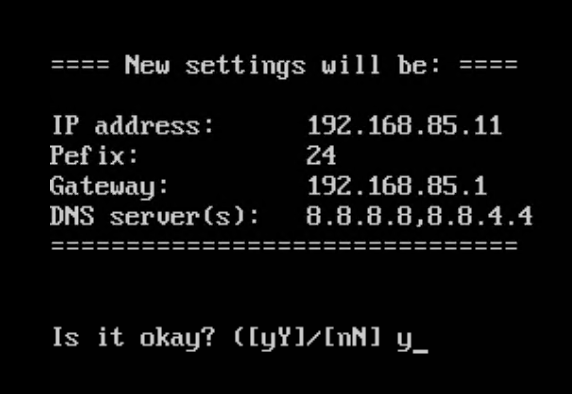
Then the network parameters are set: from now on you can connect to Padmin remotely (to the displayed URL)
WARNING
To install HA (in cluster mode), all cluster members must be available (ON) so that the installer can copy the settings to all nodes!
To install HA (in cluster mode), all cluster members must be available, so that the installer can copy the settings to every node.
4. Installing PassMan in cluster (HA) mode
Sign in to Padmin. First open the IP address of the first cluster member in the browser, with the https:// prefix (in our example, https://192.168.85.11/padmin). No valid certificate issued for your company is uploaded to the system yet, so you get a self-signed certificate error. Accept it to reach the Padmin sign-in page: select the advanced option, and continue with the link shown below it.
5. Signing in to Padmin
Enter the default manager user name and its password, Admin1234. After signing in, you get to the Dashboard.
For security, change the password after the first sign-in. You do this in the upper-right corner of the screen, under the manager menu. You can also change the language there.
6. Network settings
At the first sign-in, go through the basic configuration steps in the menu on the left. The first important part is Network settings: give the machine's own static IP address, then the gateway and the DNS. Finally select VERIFY, then SAVE. With NEW you can give more DNS servers (you can also do this later).
When the IP addresses are set, select SAVE. If they changed, the system redirects you to the IP address you set, and you must sign in to Padmin again. Do this on every member of the cluster before you continue.
7. Creating a new PassMan cluster
In the Padmin of the first node, go to the Mode menu item on the left. Choose the cluster mode, and select New Cluster. Fill in the data (you can copy the node IP addresses from the browser windows).
- The Cluster IP is the address at which you will reach the whole system. It must be a free IP address, different from the node IP addresses, in the same subnet.
- In the Node IP fields, copy the IP addresses of the cluster members. The IP address of the current node goes first.
Give the IP addresses with particular care, because the IP addresses set here CANNOT be changed later. It is advised to take snapshots of the configured hosts during the installation, because some settings cannot be undone.
When you are sure the data is correct, select SAVE. This can take a few minutes; be patient. If the cluster is created without errors, a green success message appears on the screen (with logs).
8. Adding the nodes to the cluster
Then add the other two machines to the cluster (in our example, the second and third members). In the Padmin of each of the other two nodes, go to the Mode setting, give the cluster IP address (in our example, 192.168.85.14), and select SAVE. Here, of course, you do not select New Cluster.
Add the two machines to the cluster one after the other, not at the same time. The process takes about 1.5 minutes per node. Be patient.
The PassMan cluster is now created, and its members are added. In this state, the PassMan interface cannot be used yet, because the license key is missing and the database is not encrypted.
9. Entering the license key
Visit the Padmin at the cluster IP address, starting with https:// and with /padmin at the end of the URL (in our example, https://192.168.85.14/padmin). You set the license on the left, in the License menu item. The operation runs on every member.
10. Creating the encrypted database
In the menu on the left, choose 3. Database Initialize. Here you can set whether PassMan generates the credentials automatically (they are stored only in hashed form, so they cannot be recovered), or you want to define them yourself. Choose the setting that suits you, give the data if needed, and select INITIALIZE. The encrypted PassMan database is usually created within a minute, and then the system shows the credentials needed to sign in (only once).
With credentials generated by the system, the PassMan user name is admin, and to open the vault you give the initial user name (and its password).
This information is ONLY shown, not stored. Without these credentials the system cannot be started, and PassMan MUST BE REINSTALLED from its initial state, because the encrypted database becomes unreachable. If the credentials are lost along the way, the data stored by PassMan becomes unreachable. Please note the keys and keep them in a safe place.
11. Restarting
As a last step, the cluster must be restarted so that all settings take effect. To check, sign in to the Padmin of the cluster IP again, and look at the menu on the side: it is no longer the initial (installation) list of options. If you have not done so yet, set your time zone: System settings > Time and NTP servers. Choose your time zone, then save. See Time And NTP Servers.
12. Signing in to PassMan
After the restart, the URL made from the cluster IP address takes you to the PassMan sign-in page (for example, https://192.168.85.14/ or https://192.168.85.14/passman). Sign in with the credentials shown earlier (and saved by you). Then open the vault with the second credential pair the machine showed.
In cluster mode, it is advised to open the vault on all three members. Then, if one member stops, the signed-in users can use a vault on one of the members that still work, so you do not have to deal with opening the vault after a failure: the system is fault tolerant.
After signing in, it is worth creating more vault users right away, who can also open the virtual safe. We recommend keeping the initial user and its password in a safe for emergencies. Only a user who, besides knowing the credentials, has also been given the permission for it can open the vault.
This completes the installation and basic configuration of the base system. PassMan can now be used, and you can start recording secrets. To import passwords, add a new user and give them full permissions on the vault structure, because the initial (superadmin) user cannot import. It is also worth creating a new user so that the original account remains for emergencies (for example, if a wrong multifactor setting locked you out).
In Padmin you can also do further configuration: for example, setting an external syslog server, reconfiguring the time and NTP servers, giving the email server, stopping and restarting components, querying status information, backing up data, and updating the system.