powerCLI - Passman import
- Import PassMan image using PowerCLI
- IP address setting for DHCP beállítása DHCP esetén
- Enter / Change IP address
- Installing PassMan in 'SingleNode' mode
1. Import PassMan image using PowerCLI
You can also import the image file using Vmware PowerCli:
If you do not already have PowerCLI installed, download it from https://code.vmware.com/web/tool/11.3.0/vmware-powercli and install it.
Then you need to start PowerCLI and run the following commands:
- Access to the VCenter: Connect-VIServer -Server vcenter_szerver -User administrator@vsphere.local -Password "pwd here"
Name Port User---- ---- ----
vc 443 VSPHERE.LOCAL\Administrator
Then issue the following commands:
- $ovfpath = ".\PMA_3.0.0-20.07.10-1281_FINAL.ova"
- $ovfConfig = Get-OvfConfiguration -Ovf $ovfpath
- Import-VApp -Source $ovfpath -OvfConfiguration $ovfConfig -Name "Passman_VM_name" -VMHost "szerver neve" -Location "Cluster_név" -Datastore "datastore név" -DiskStorageFormat thin -Confirm:$false
Name PowerState Num CPUs MemoryGB
---- ---------- -------- --------
Passman_VM_name PoweredOff 2 4,000
WARNING
It is forbidden to start the imported VM image, because there are processes that only run on the first start!
Due to the warning above it is worth making a clone VM of the imported image you will use for the live service.
Then select the proper network where your live VM should be placed:
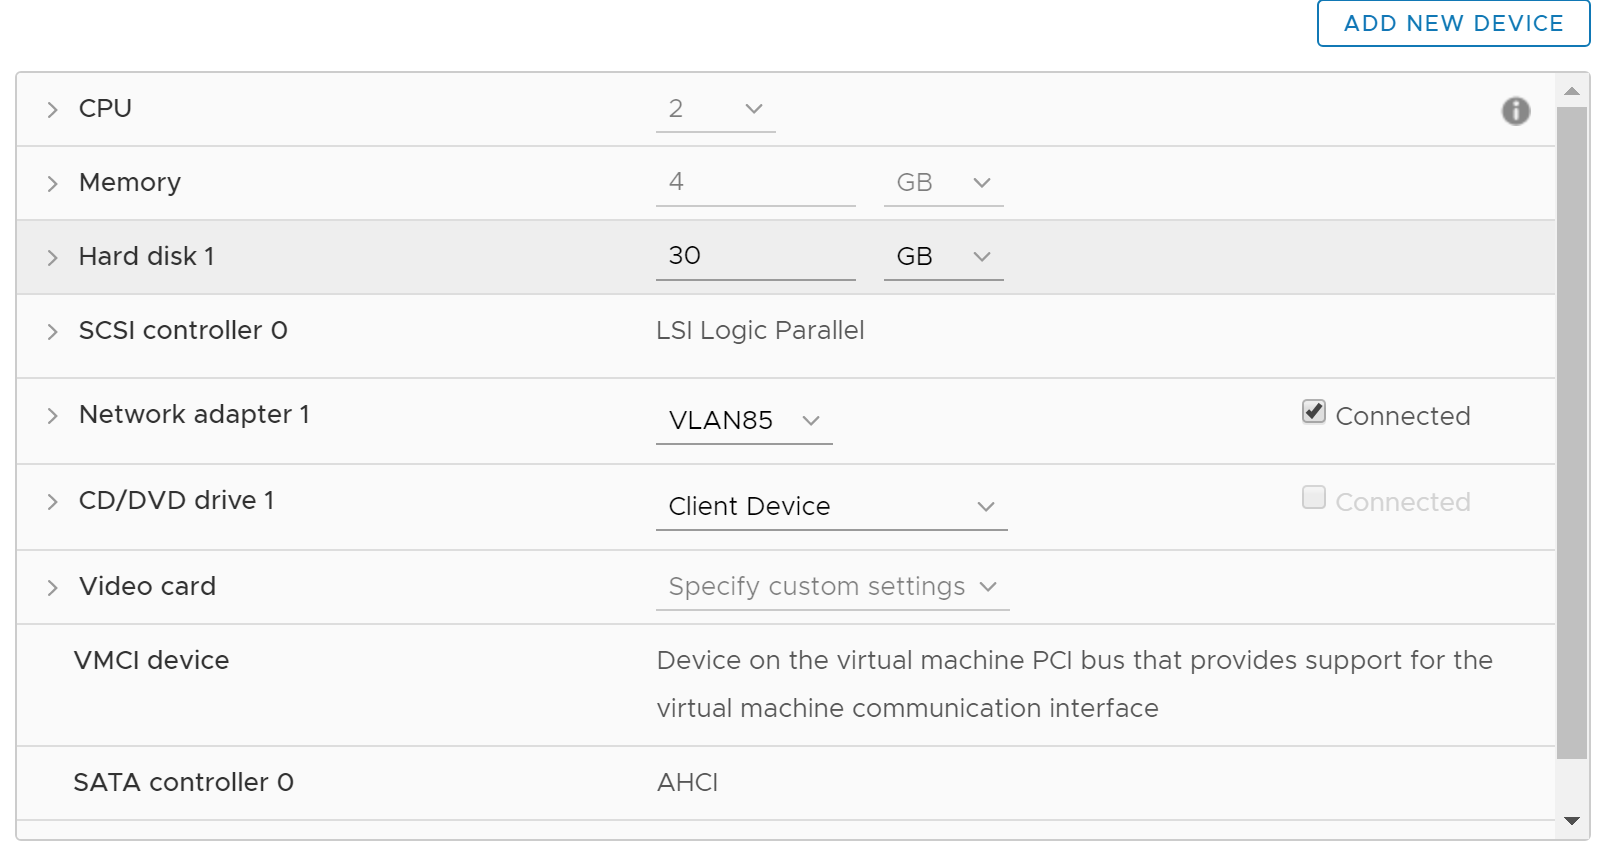
Finally, configure the required resources such as host, datastore, network.
IMPORTANT
Machines will use DHCP to request IP at the first start up, so it's important to have DHCP service on the selected network segment.
2. IP address setting for DHCP
- In the VMware environment, the DHCP server will assign IP address to the imported / cloned machines. There are 2 ways to determine their IPs.
- With VMware tools we see this (172.17.x.x is an internal IP address, we need the other one) :
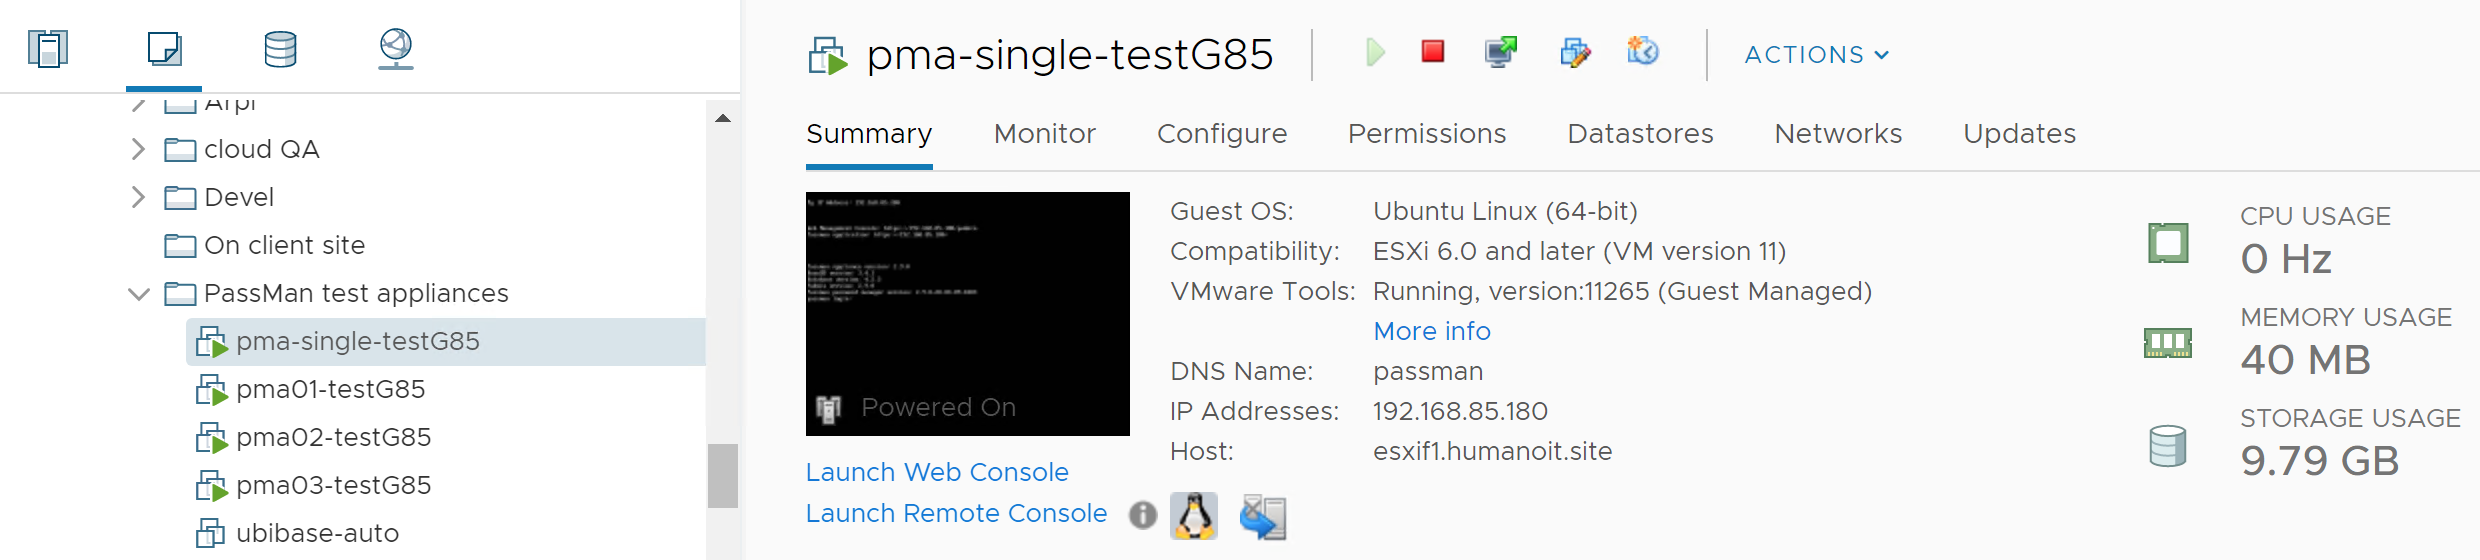
- Start the machine with the triangle (play) icon
- After opening the Web Console (Launch Web Console) you can see the IP address (My IP Address) :
- With VMware tools we see this (172.17.x.x is an internal IP address, we need the other one) :
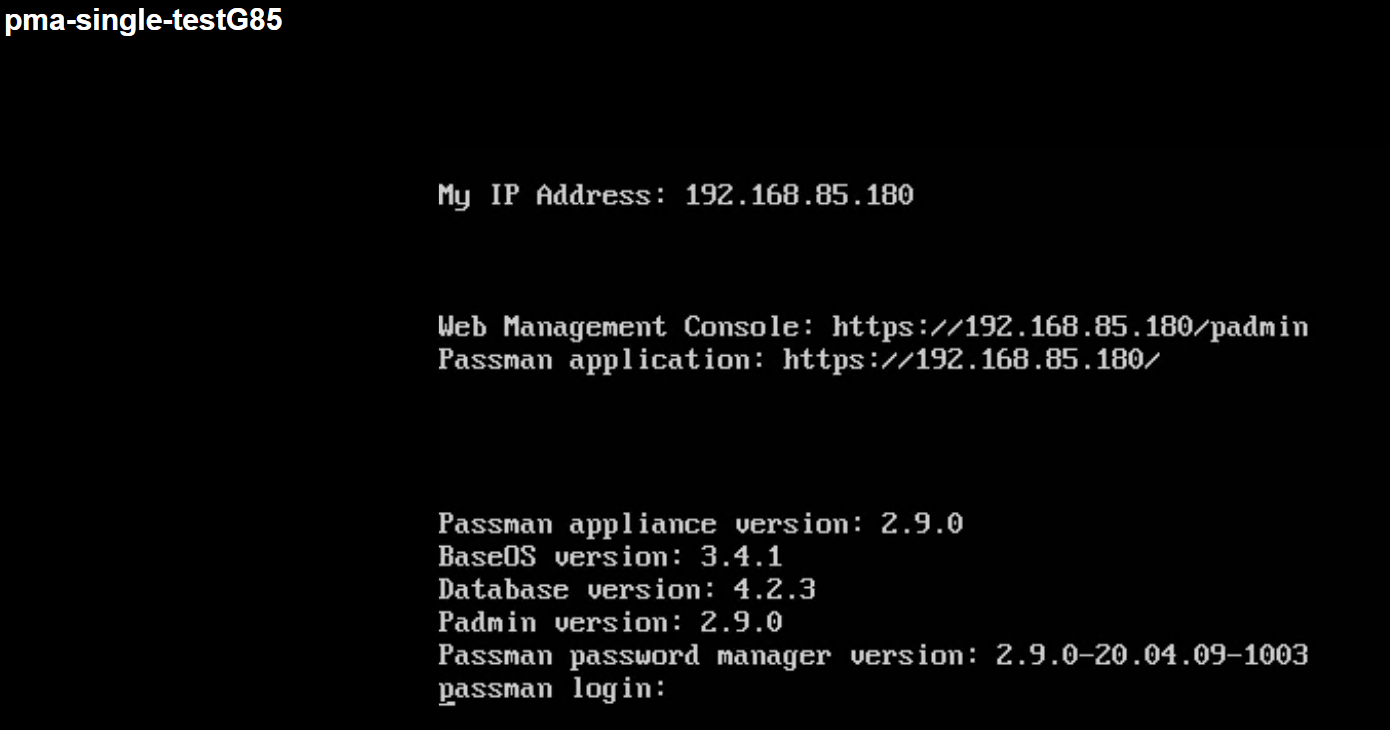
- If no dynamic IP address was given, the IP address won't be displayed at the top.
- In this case, we need to enter an IP address manually - in the next step.
- Check that the IP address that will be assigned is not used on your network! If it is busy, set a free IP address!
3. Enter / change IP address
- Log in with the user changeip (password: changeip) :
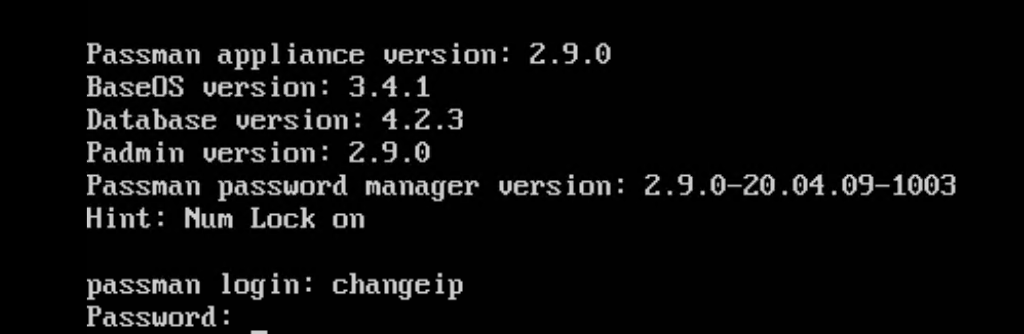
- From the menu, select Set IP settings.
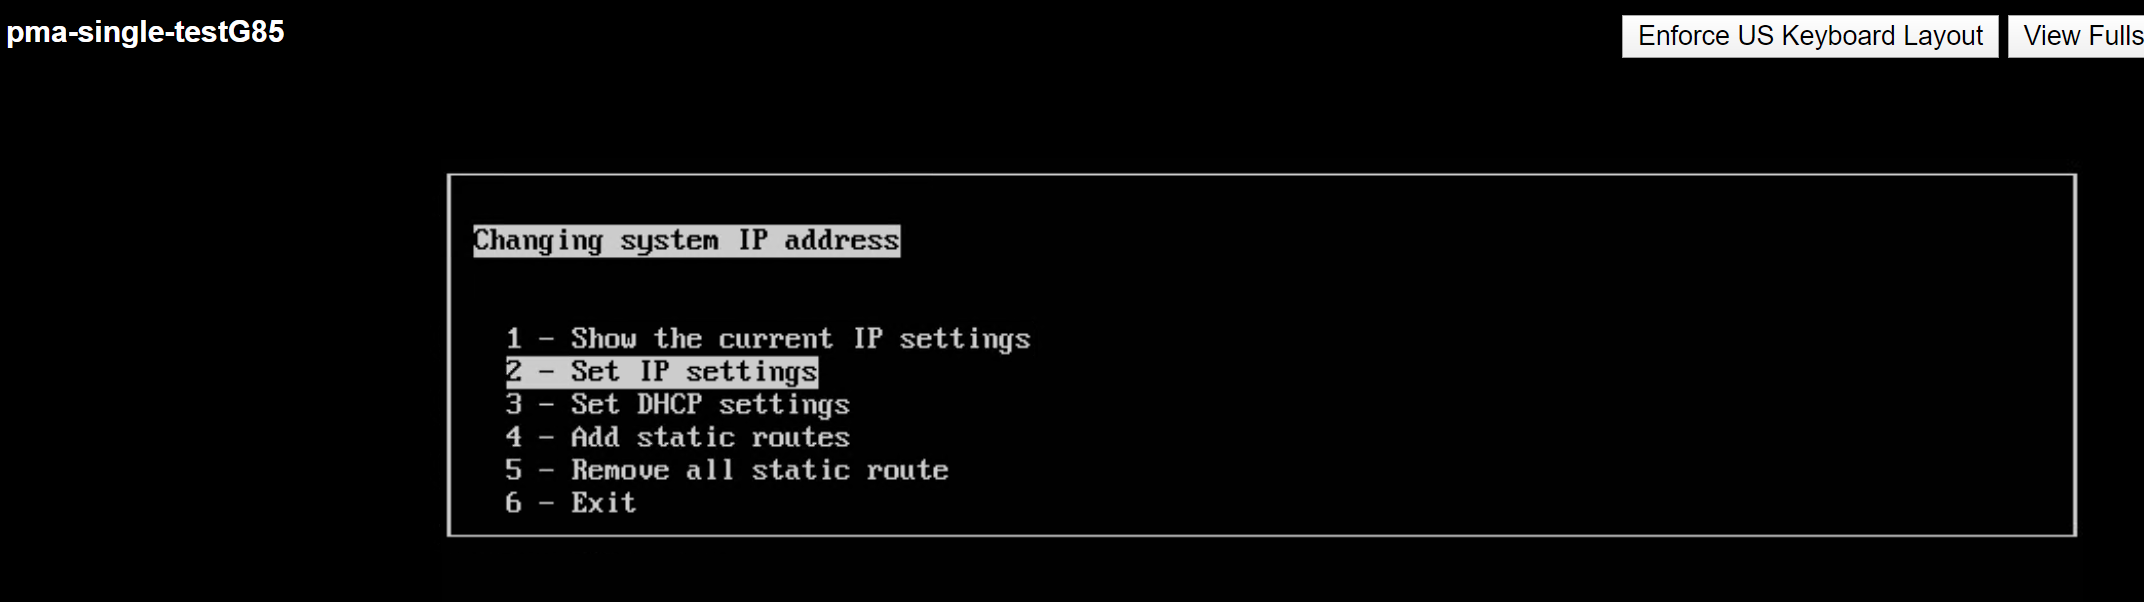
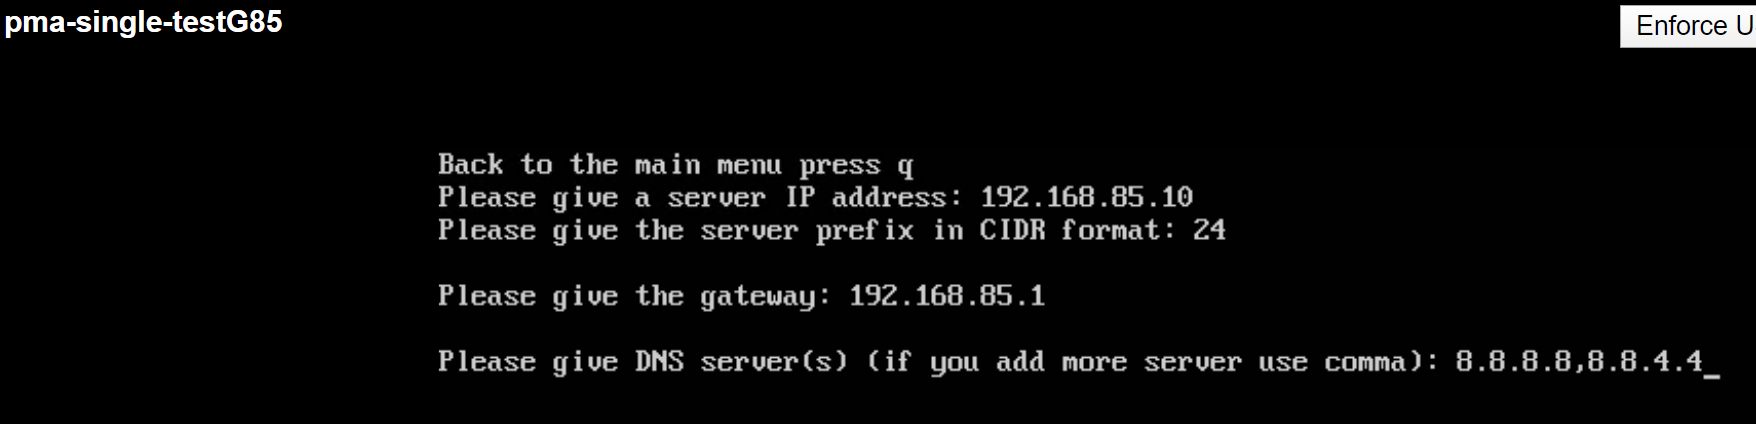
- Set the parameters.
- It will first ask for the Server IP, which is the IP address you want to change to.
- Set all the parameters the machine asks for: here is a possible example:
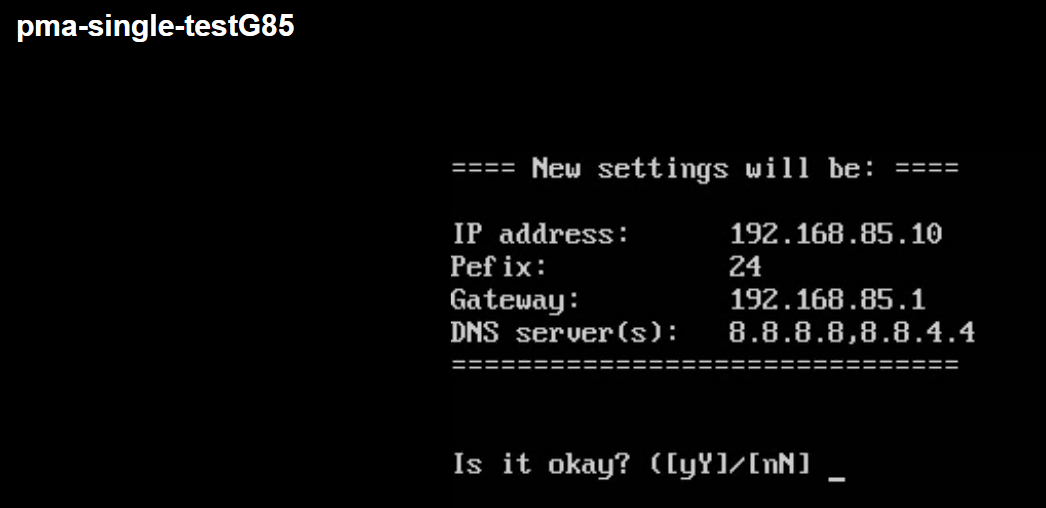
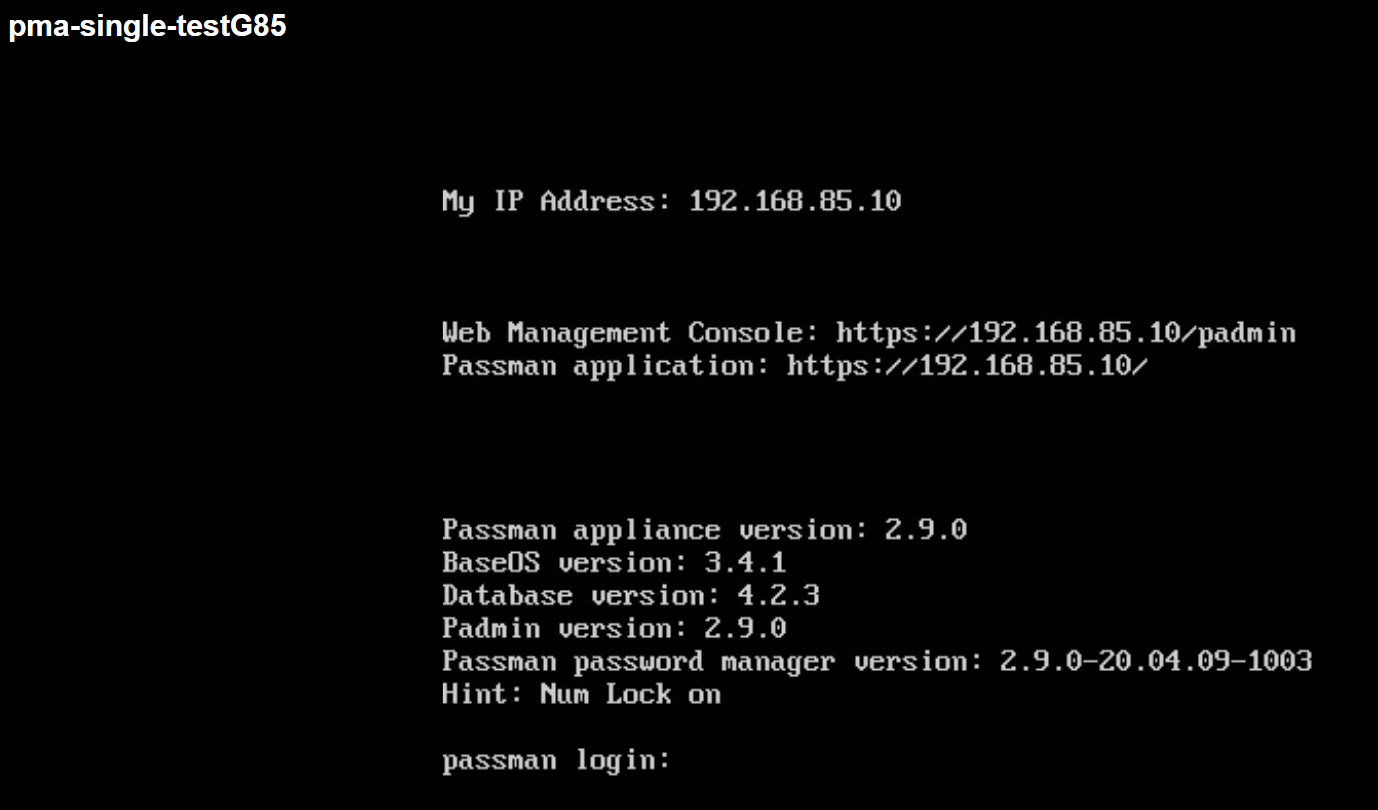
- Finally, the network parameters are set. From now on you can connect to the Padmin remotely (based on the URL displayed)
Once you have finished configuring the virtual machine, you can switch to Installing Passman in 'SingleNode'