Multifactor Authentication
What is multifactor authentication?
Multi-factor authentication is a method of confirming a user's claimed identity in which a user is granted access only after successfully presenting 2 or more pieces of evidence (or factors) to an authentication mechanism.
Two-step authentication method uses something the user knows (password) and a second factor other than something they have or something they are. An example of a second step might be a 6 digit number generated by an app that is common to the user and the authentication system. (This is exactly what we are using in PassMan.)
The use of multiple authentication factors to prove one's identity is based on the premise that an unauthorized actor is unlikely to be able to supply the factors required for access. If, in an authentication attempt, at least one of the components is missing or supplied incorrectly, the user's identity is not established with sufficient certainty and access to the asset (data) being protected by multi-factor authentication then remains blocked.
The authentication factors of a multi-factor authentication scheme may include:
- some physical object in the possession of the user, such as a USB stick with a secret token, a bank card, a key
- some secret known to the user, such as a password, PIN, TAN
- some physical characteristic of the user (biometrics), such as a fingerprint, eye iris, voice, typing speed, pattern in key press intervals*
*source Wikipedia.org
Long story short: for loging into PassMan, the user has to provide the accounts' password as well as a six digit PIN number ganerated by an application (on a smartphone).
NOTE! This method is not a substitution for login name/password datasets. In contrary, it is an additional step in the login process.
Setting multifactor authentication for other users
To be able to set this function for other users, first we need to have "User administrator" priviladges.
We need to distinguish between two states that the multifactor authentication can exist: Required and Not required. In case of Not requiered we need to understand that this state is not an absolate state, meaning, that if for a given user's multifactor authentication is set for Not required that only means that the system does not need the PIN code for logging in, but the user can set if for themself if they chose to.
Set it for a new user:
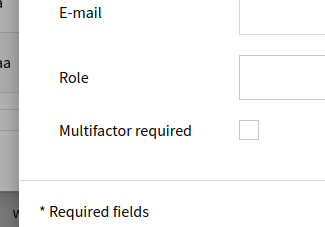
At the Add new user window, at the button of the pop-up there is a checkbox with the label: Multifactor required. By checking this box the user is forced to use this extra step for a successful log in.
Set it for an existing user:
To force an existing user for using this fuction just open the Edit user pop-up window (which looks exacly as the picture above) and check the Multifactor required checkbox.
First login after it has been set by an administrator:
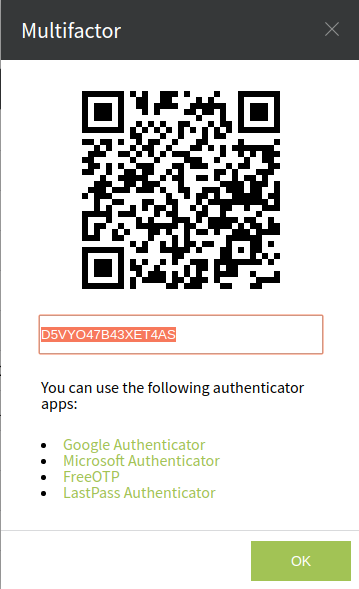
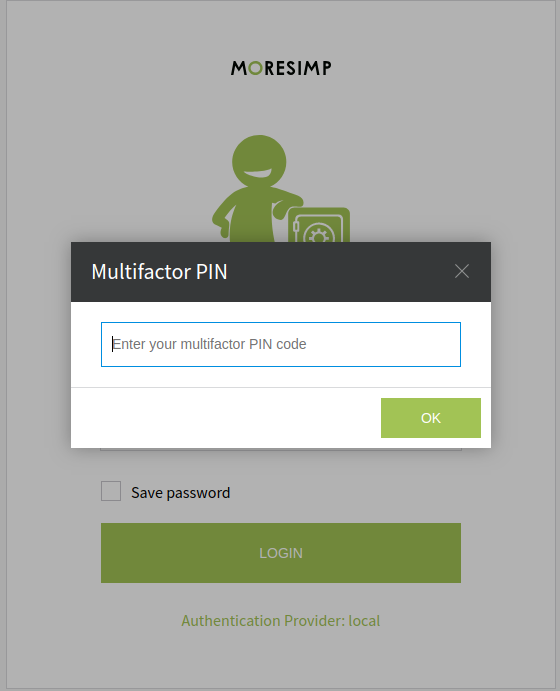
When multifactor authentication has been set (by the administrator), than the next login looks a bit different. After providing the login name and password (and selecting the corect authentication provider of course) the Login button activates jet another pop-up window, a window displaying a QR-code that has to be scanned by the user (with the help of a smarthphone and the right application for it). After it has been scanned click on the OK button. Immediately a new window will pop-up, asking for the six digit long PIN-code which changes every 30 seconds! This PIN-code is generated by the authenticator application using the QR-code scanned. If the PIN has not been enterd correctly (or user run out of time, the code changed and they entered the "old" one) than an error message will pop-up to let the user know that the authentication failed. If everything went as expected the user is logged into PassMan.
Delete QR-code for other users:
When a user has got a QR-code and it is used for authentication there is going to be an additional ikon in the Actions column under the User administration table which looks exacly like this: . This icon has a "Delete QR-code" fuction tied to it. This is usefull when someone has changed their smartphone (bought a new one or the old has been danaged and/or it has been stolen/lost). In this kind of situation the user cannot log in because the QR-code is linked to that specific hardware (phone). For getting a new QR-code, the user first has to log in, but to log in they need the PIN generated from the QR. Catch-22. To resolve this conflict, an administrator first has to delete the existing QR-code from the system. Than the user can login as usual, but a new QR-code will be displayed during the login proceedure. This one should be scanned and used further on.
Setting multifactor authentication for ourselves:
In case that the multifactor authentication is not required for login, the user can choose if they want to us it or not. To set it as a mandatory step in the log in procedure simply navigate to the User menu and select Settings. In the pop-up window there is a checkbox labeled Multifactor authentication requered. Check the checkbox to activate it. If it is checked than a button next to it will become clickeble. It says GENERATE NEW SECRET. By clicking on it a new pop-up window will activate with a QR-code which needs to be scanned by an authenticator application. And we are all set for using the two-steps authentication in the next log in atempt.
Note! The user is not able to delete its own QR-code if and only if they got User administrator priviladges. The user ganerate new QR-code any time they want.
Choosing the authenticator application
We suggest to use one of the following four: Google Authenticator, Microsoft Authenticator, FreeOTP, LastPass Authenticator. Although more than sure that other applications will be just as good as the above ones for safely authenticate into PassMan, we have tested these and suggesting to use one from the list. The first three from the list are free of cost, the fourth one is a payed application.


