Change Permissions
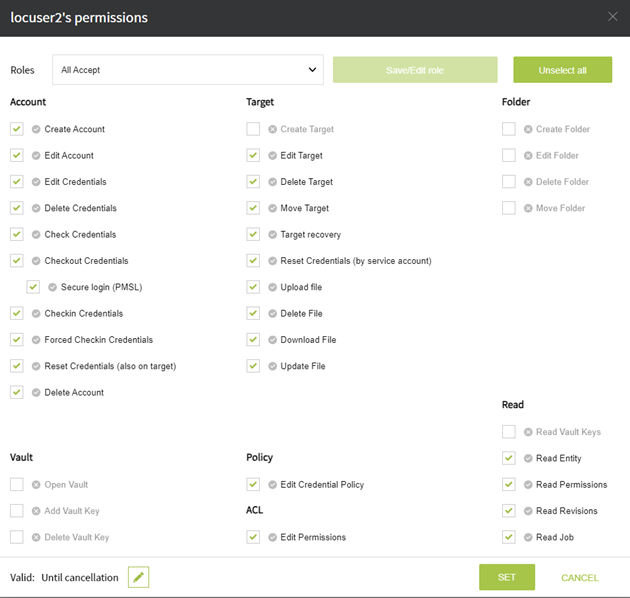
It is possible to control which user has access to exactly what kind of information or job to run. The detailed list of permissions can be found here.
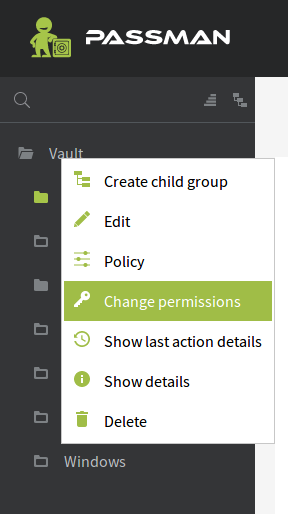
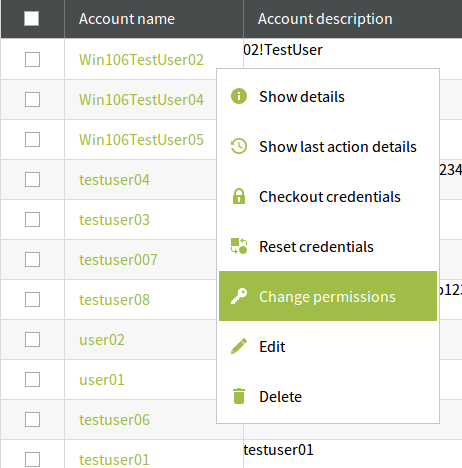
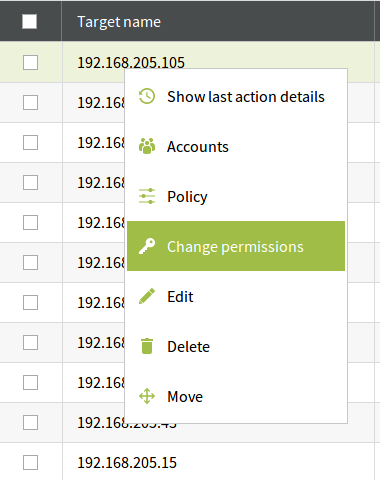
Permission settings are very complex. It is possible to set a permission list for a group, a Target or an Account. To access the permissions settings just trigger the context menu for the object you want to set it for and select Change permissions option.
The above pictures show how to access the Change permission option in the tree, Target tab and Accounts tab respectively.
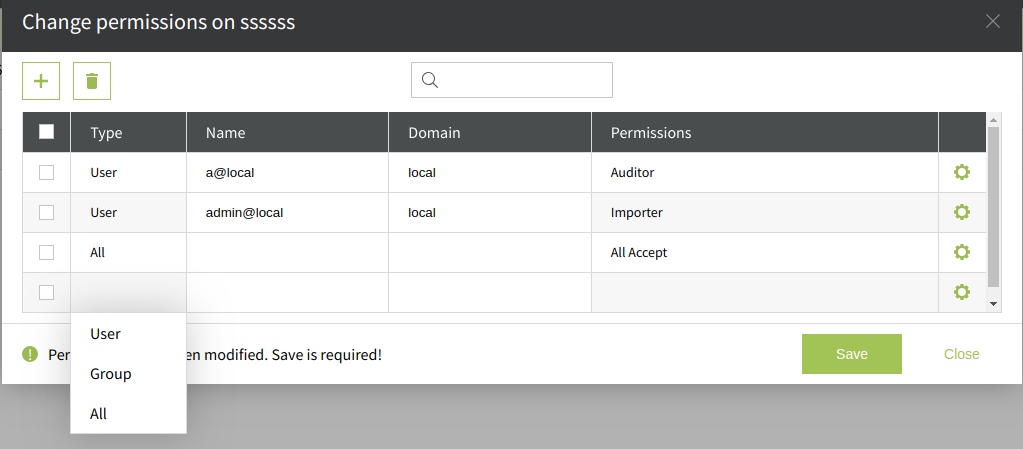
Above there is a Change Permission pop-up window. As seen in the picture, there are five columns and one check-box columns where it is possible to set privileges.
The Type column is a select drop-down menu with two statuses: User, Group and All. This defines who will benefit from these settings.
The next column, Name is a similar select popup dialog, where it is possible to select (as the name says) between the existing user or a group. Dialog buttons: Update provider, Download all names (for updating the list), Close, Select (for selecting to permission owner).
Domain column usually gets completed when selecting the user name, but basicaly can select between the local or AD users.
The Permissions column shows a list of pre-defined "roles" we can allocate to (or take away from) a user/group.
When a permission "role" is set, it is possible to define one-by-one what permissions a person/group can have and what they should rather not have. The detailed list of permissions can be found here.
To add a permission simply click on the icon in the upper left corner of the window. To delete one, first check the check-box in front of it, than click on the icon.
When clicking on the gear the pop-up window from under will appear.
Access for a limited time
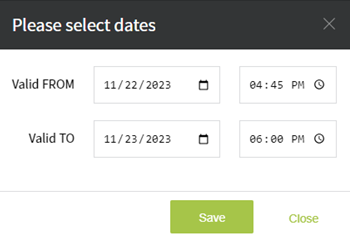
If you want to set the rights of a user or group for a specific time, click on the icon in the lower left corner, next to Valid: Until cancellation text.
In the pop-up window, you can choose how long the given access should be valid, then click the Save button.
To finalize the settings, click the SET button in the lower right corner.
As seen, it is possible to set every single job or readability privileges one-by-on. The marks left of the labels, in the small circle, refers to the inherited permissions (X = not inherited from the parent). The checkbox has three states: check, cross and empty. When the checkbox is checked than the permission is granted, the cross denies the permission totally and the empty stat means that the permission is inherited from the parent, and it will get the same status as in the circle mark.
Attention! It is possible to deny the Permission Update as well. That means that the user/group will have no access to set a different permission policy for that given entity.
If (for example) the Change Permissions is denied for (let's say) all users, that means that NO ONE can Change Permissions settings any more. The same is true for just READING the database. If you deny read access from everyone than the database CAN NOT be viewed (never the less worked with) by anyone. Be very careful when setting permissions. It can do a lot of damage and set a lot of limitations that can not be undone.
On the Vault (by default) there is an ACCEPT ALL permission. If possible, please DO NOT remove that verdict or add an Open Vault verdict for one of the users/administrator. Otherwise, when the system restarts (after an update or maintenence session) nobody will be able to open the Vault, meaning the system is not accessible, becomes useless.
Please take extra care when setting permissions on the Vault!!!

