Using the Account Detail Window
Above there is an Account Details window. This screens' purpose is for the user to view all informations and to be able to run every kind of job and check in one place.
To activate this window simply click on the accounts' name. Another way is to click on the litle "i" letter in the Actions column in the Accounts pop-up window.
So, let's overview the buttons first. As you can see all buttens are numbered in the picture.
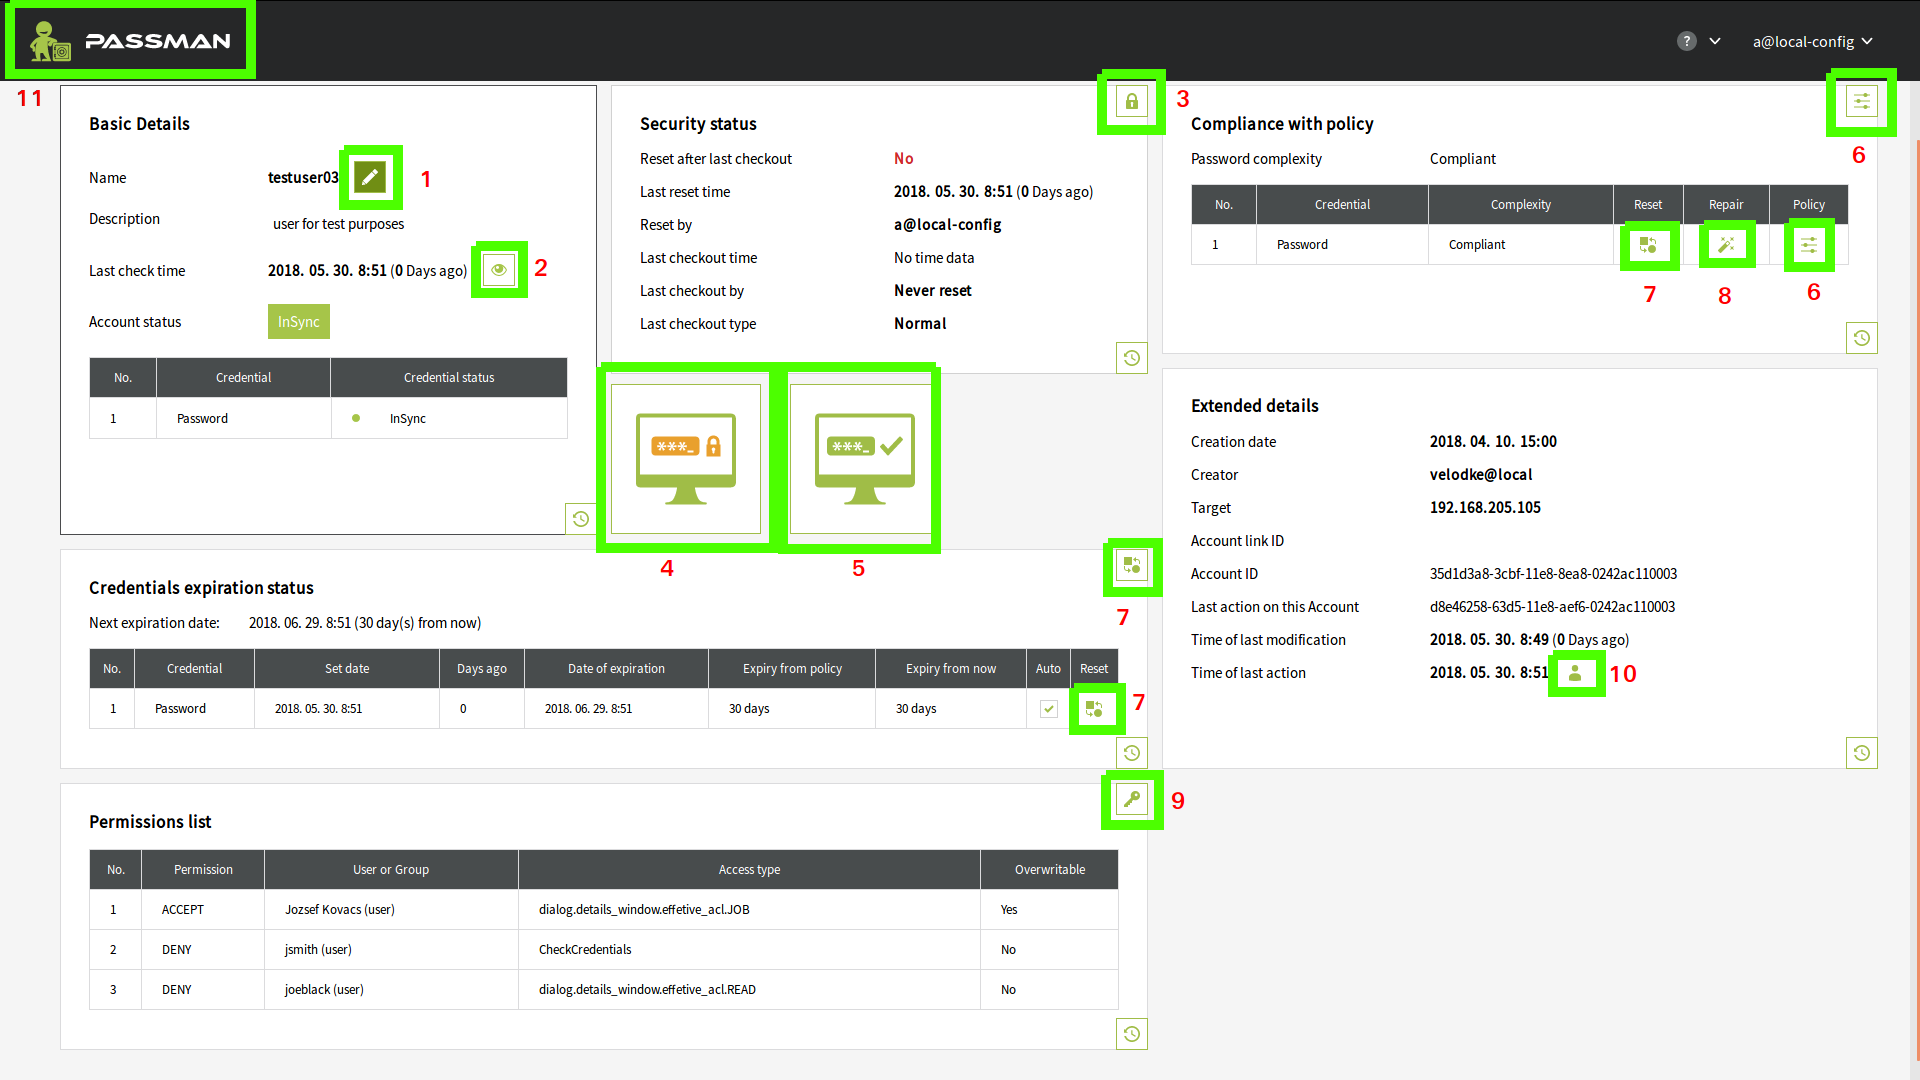
- Edit the Account
- Check Credentials Status
- Checkout credentials
- 1-click connection where the system asks for the password but not for the user name
- 1-click connection where no username or password is requered, but the user has to have checkout permission for that particular account
- Password policy settings pop-up window
- Reset credentials
- Auto reset credentials by inforcing the policy
- Permission setting table
- User who executed the last action (the mouse pointer has to be hovered above the little avatar and the users' name will be displayed as a tooltip)
- Exit the window
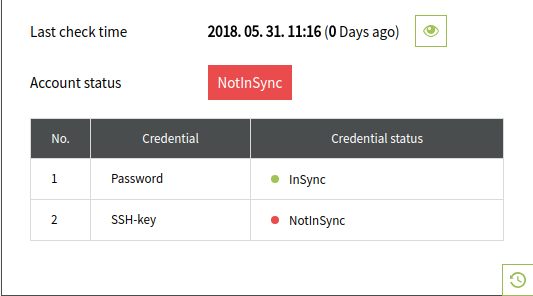
In the Basic Details section it is possible that the accound shows NotInSync status although one of the credential is correct (InSync). This is because PassMan considers an account InSync if and only if all of the credentials are correct.
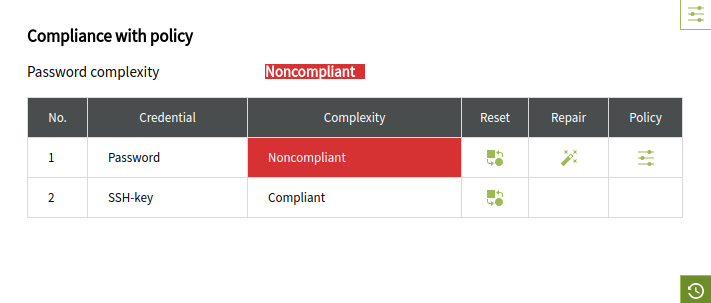
In the Conpliance with policy section there are two statuses: Conplient and Noncompliant. The later means that the credential might not be as long or as complex as the policy demands.
To make it complient again we have got two options. Either change it manualy (click on button #7) or automaticly (click on butten #8), which is basicly a Reset Credentials job with password generation and that will always be complient since the generation of the credential is based on the rules set in the Policy settings (butten #6).
Although this credential will be powerful and complient with the policy, more than sure that it will not be a meaningful word.
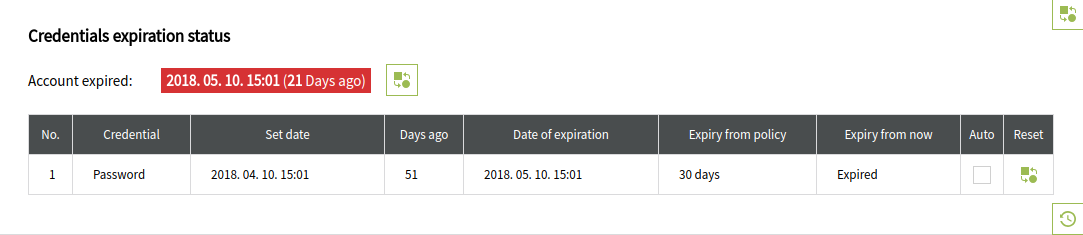
The Credential expiration status section gives an overall information about the expiration time, the lenght of the credential being "alive" and whether or not the account is set for an automatic credential renewal (this can be set in the Edit Account window). There are nine columns in this table. The secund one tells us the credential yipe. The third and forth are the date when the credential has been last (re)set and how long ago that was. The fifth column is about the exact date when the credential expires. Six column is the lengt of days set in the policy for a credential to get expired. The seventh column shows how many days are left until the credential will expire. If it has already expired than this column will show Expired. The secund to last column, the eight, informs whether or not the account is set for an auto reset befor the credentials would expire (this can be set in the Edit Account window). And the last column is a button for Reset credentials (button #7). On the picture below actually there are three places wher this button can be found.
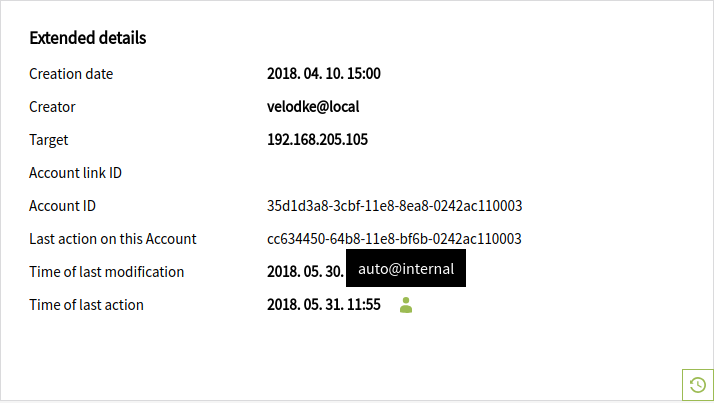
The Extanded details section looks incomprehensible for the first time but actually it is not so scarry. The first three filds do not need any exlanation. The Account ID and the Last action on this Account are the identification numbers in the database. Time of last action and Time of last modification are different because an action not always involves a modification on the account (ex: Check, CheckOut, Checkin, etc.). If the mouse pointer is hovered above the litle avatar next to the Time of last action field than the user who trigered that action is displayed as a tooltip. (In our case it is auto@internal which meanse that this action van an automated action, trigered by the system itself.)
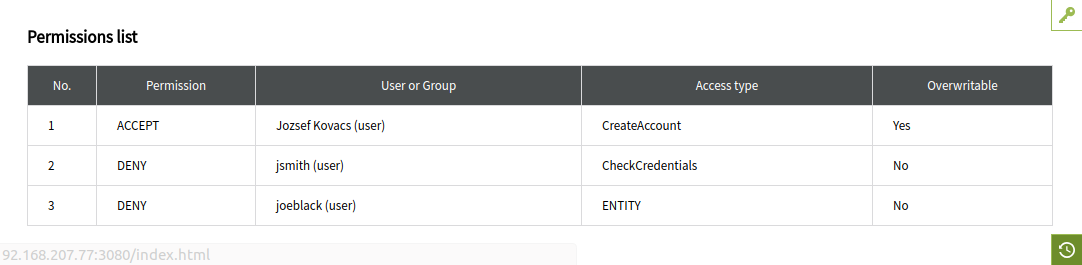
The Permission list section display all the permissions set for this particular account. Anfortunatly it is not retrospective, meaning that if some permissions are set higher up in the hierarhy (group or target) that is not displayed here. Also there is a possibility to edit this list (by clicking on the button #9 on the top right corner of the section). You can find more information on the Change Permissions page.